

Making voids
You can create voids in your castings by using shapes to exclude glass. The shape you use can be a simple Circle or a complex ShapeCaster creation.
Start by selecting the appropriate Circle, and bending it to shape.
Curl a fiber strip around the outside edge of the Circle. Make sure it touches the outside surface all the way around.
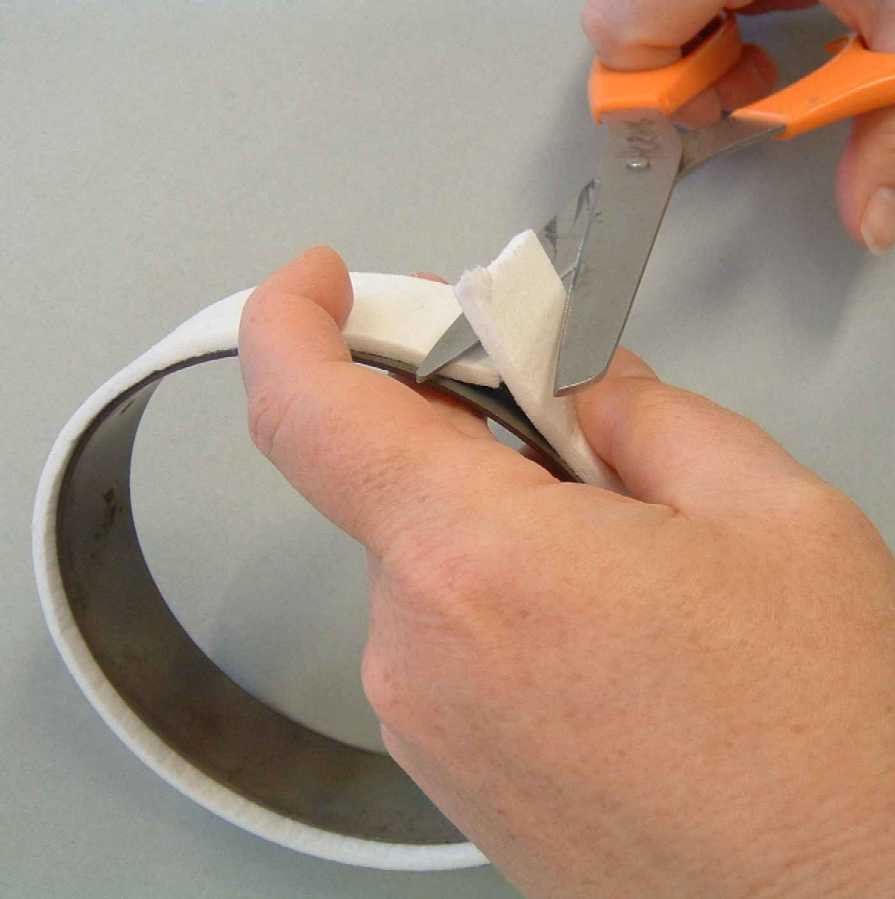
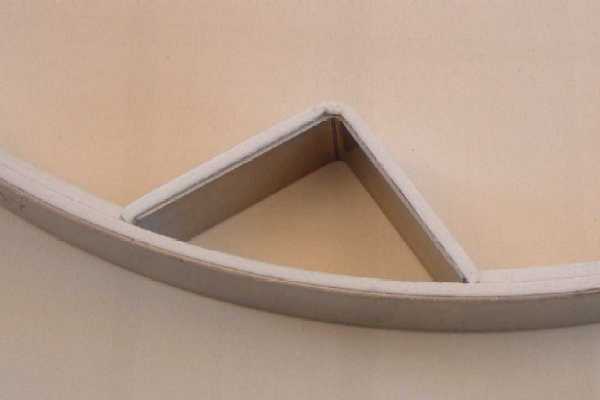
With scissors or a razor knife, cut the strip slightly past where it touches it’s other end, as in the photo. Make sure the cut end is square; a little longer is better than too short.
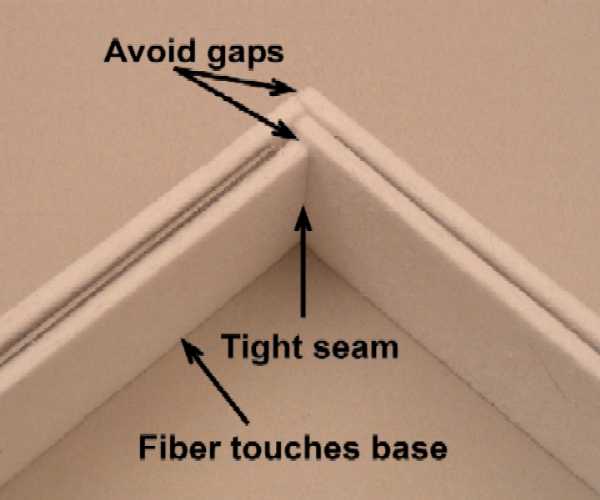
Tuck the edges against each other to insure you have a good fit. It’s important that NO GAP EXISTS WHERE GLASS CAN TOUCH METAL during casting. If you use more than one piece of fiber in a layer, make sure the ends butt up snugly.
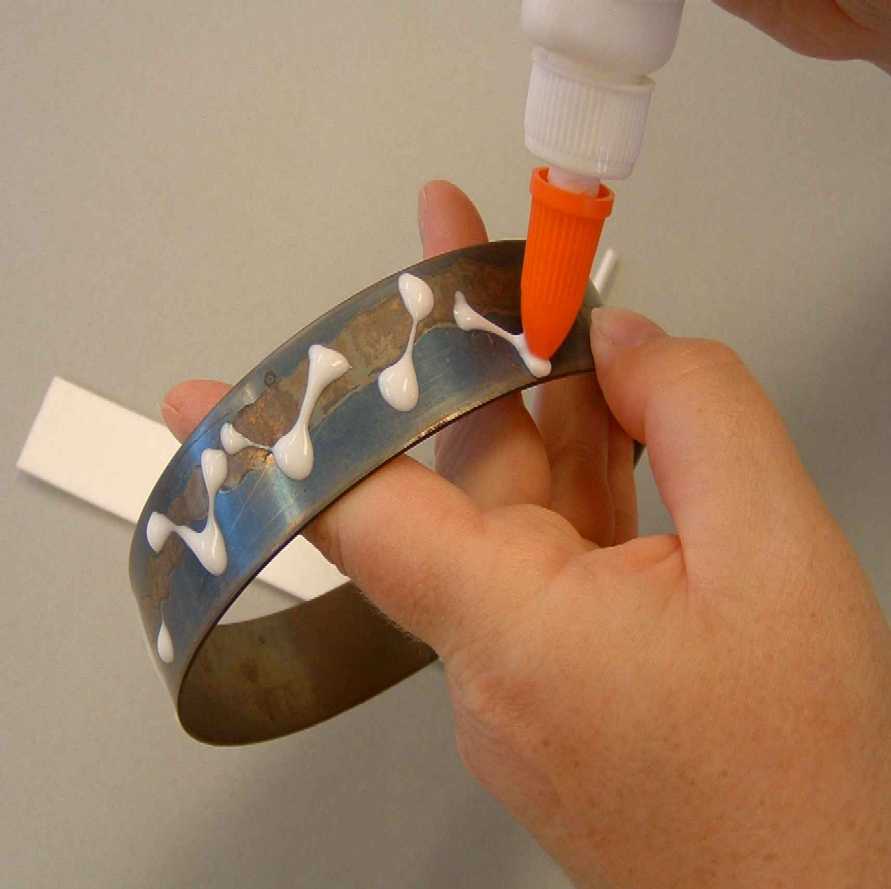
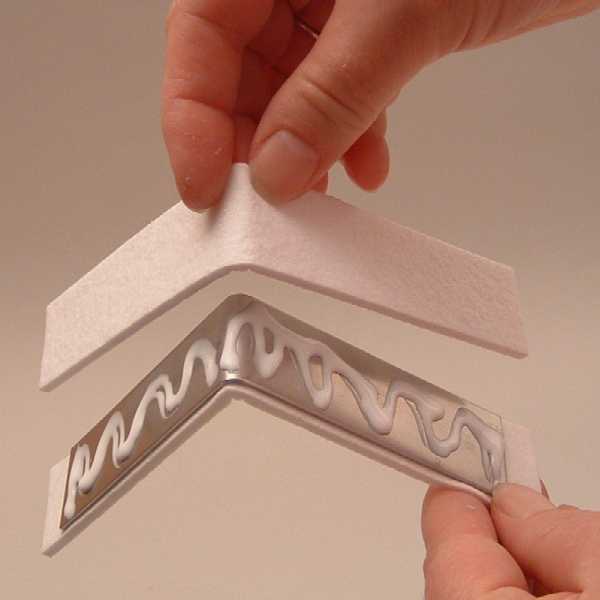
Set the fiber aside and run a line or series of glue dots around the outside of the Circle, as in the photo.
Use a spring clip to hold one end of the fiber to the outside edge of the Circle, and stretch the fiber around until the ends meet. Make sure the fiber touches the metal surface all the way around, and the ends butt snugly with no gaps. Clip the other end in place.
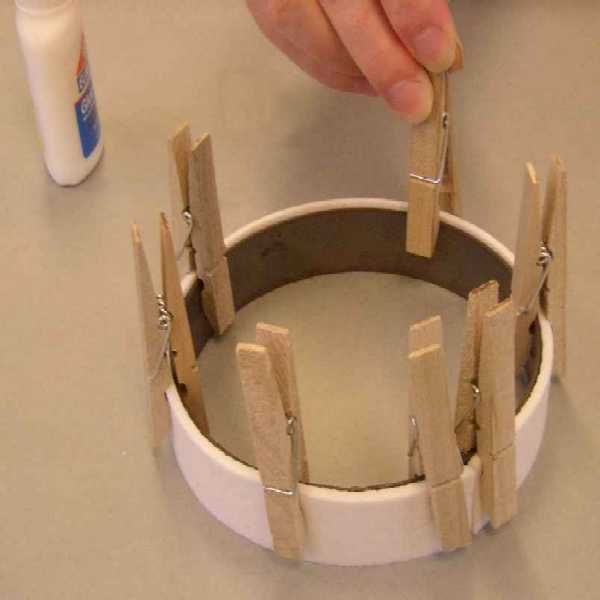
Place the Circle on a flat surface. Push the fiber down to make sure the edge touches the surface, COVERING THE METAL COMPLETELY. Use more clips to hold it in place, as needed. Leave the clips in place for 5 – 10 minutes to allow the glue to set.
When the glue has had time to set, remove the clips. Only one layer of fiber is required on the outside of a Circle, regardless of size; you can use more if you want to make the diameter larger.
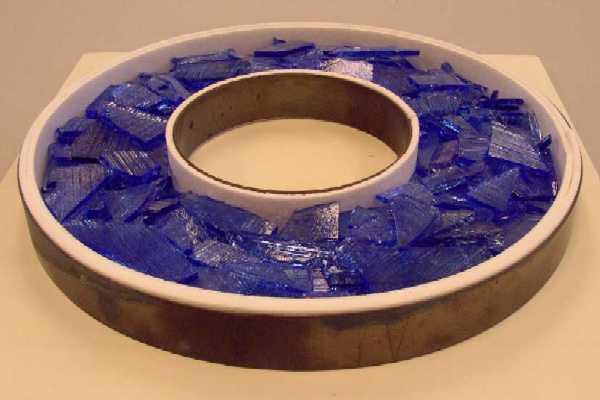
Place the Circle in your casting, and build your casting by placing the glass. Fire and anneal using a firing profile appropriate to the size and thickness.
Voids with Angles
As with Circles, you can make voids in your castings with fiber-covered Angles. Here are some points to remember when doing this:
First, be aware that sharp corners and extreme angles in voids create internal stress points that require extra care during annealing and cool-down. We'll address this later in the section on annealing. Sharp corners and tight angles also require extra care when placing glass, to ensure they fill properly, and require careful handling after casting and during coldwork.
Clips help hold the fiber in place until the glue dries.
Fiber strips glued on the outside of an angle need to be slightly longer than on the inside. Ideally, the strip you glue on should be longer than you need so it can be trimmed to size.
Avoid gaps between your fiber that could allow glass to flow through or touch metal. You can overlap the fiber to avoid gaps, making a lap joint. Lap joints can make sharper corners inside or out. Again, be aware of issues with sharp corners.
Used fiber will conform more easily to an outside surface than new fiber. If you are using new fiber on the outside, use slightly more glue, more clips, and allow more time for drying.
Filling the void

Ok, so now you've got a big hole in your casting. Why not fill it with glass? This allows you to make two (or more) castings at the same time, maximizing the use of your kiln space. The second casting can be recast into the larger piece in a subsequent firing, added to a different casting, or be finished by itself.
Simultaneously cast inside and outside a Circle by lining both sides with fiber. Start by gluing the inside layer first and allowing it to dry; then add the outside layer.
When applying fiber to both sides of a shape, first glue one side & allow it to dry, then glue the other. Dry-fitting both pieces of fiber before gluing helps the process go more smoothly and gives you a cleaner form by minimizing handling of the glued fiber.